I am also a little bit of a DIY-er. I have made a garden, a skirt, a love story sign....uh, one time I made this needlepoint thing in Young Women's....I went through a big latch-hook phase in middle school....plus I also make dinner almost e'er night.
And last week, I DIYed a jewelry hanger! Here's the final product:
 |
| Just hanging on the mirror for now... |
Here's how I DImyself:
Step 1. Find a cute picture frame. I got mine at a fundraiser carnival for Alex Homer, this absolutely adorable little boy who is going to be in my class next year. They had a boutique set up at the carnival and I felt like I was walking through a real live Etsy. I bought my picture frame already painted black, already distressed on the edges, and already hanging on the ribbon. But you could really get any thick picture frame that you like, and then you're of course welcome to paint it and distress the edges and whatever else you want to do.
Step 2. Get cup hooks. I got mine from Home Depot, here. I got the nickel-plated ones, but they also have them in white and gold. These are super-easy to work with on one condition: your picture frame has to be pretty thick. Otherwise, when you screw in the cup hooks, the wood will bump up and pucker and bulge and splinter.
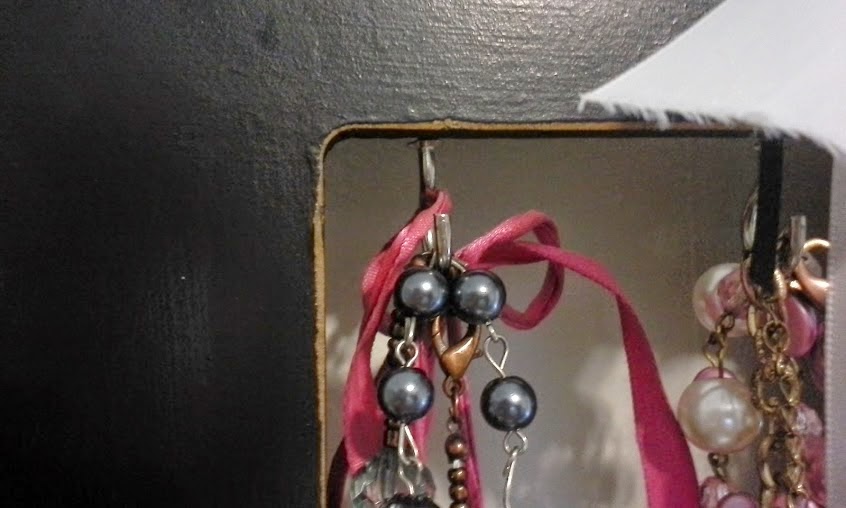
Step 3. Screw in the cup hooks. I've seen a bunch of these on Pinterest where people put their's on the bottom of the frame, too. I chose to put mine on the inside of the top.
 |
| As you can see, I didn't quite screw my hooks in all the way. |
 |
| I put like 3-4 necklaces on each hook, and so far, I have not had any problems. They've held up great! |
No comments:
Post a Comment